The settings of Amimoto AMI have been revised from the CentOS version to the Amazon Linux / RedHat Linux Enterprise version.
The differences between the CentOS version and the Amazon Linux / RedHat Linux Enterprise version are below.
The Features of the Marketplace Version of Amimoto AMI (Amazon Linux / RedHat Linux Enterprise)
- Minor version ups of Nginx 1.4, PHP 5.4, Percona MySQL 5.5
(The Amimoto Amazon Linux version installs the latest version of the softwares at the time of creating the instance.) - The process watching software, monit is installed.
monit will watch the process of php-fpm, nginx and mysql and when they stop, monit will restart them. - Make the 2GB swap area for t1.micro instance.
It fixes the issue of preventing from stopping yum update because of full memory. - Optimizing the parameters depends on the type of instances.
The right parameters of Nginx, PHP, MySQL are set up for the type of instances.
As mentioned above, the new AMI has many benefits, though some of you are still using the old ones because you think it as too much trouble to reconfigure the new instance or move the data from the old ones.
So, here is the description of how to create a new instance and move the data from the old instance to the new one.
Before getting started, please create a new instance from the Marketplace version of Amimoto AMI.
Creating Snapshot
First of all, create Snapshot of the current instance.
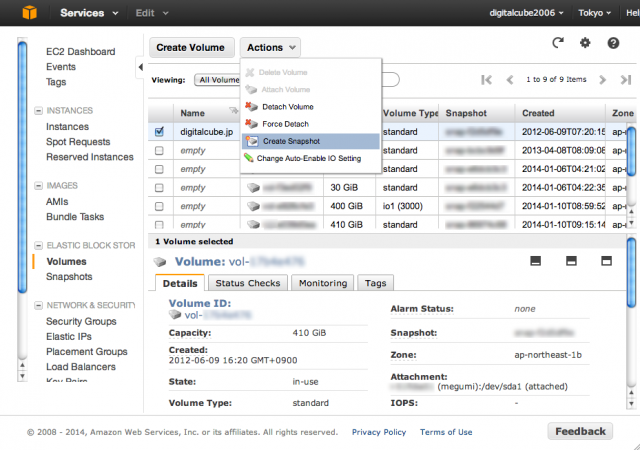
Log in to AWS management console and open EC2 Dashboard.
Select Volumes at the side menu.
Select the volume of the current instance, and select [Actions] – [Create Snapshot].
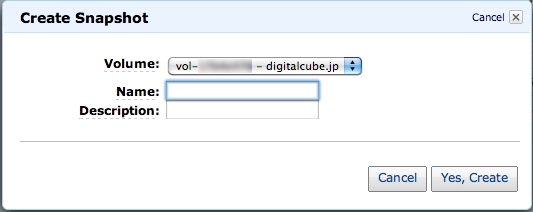
Enter [Name] [Description], then click the [Yes, Create] button.
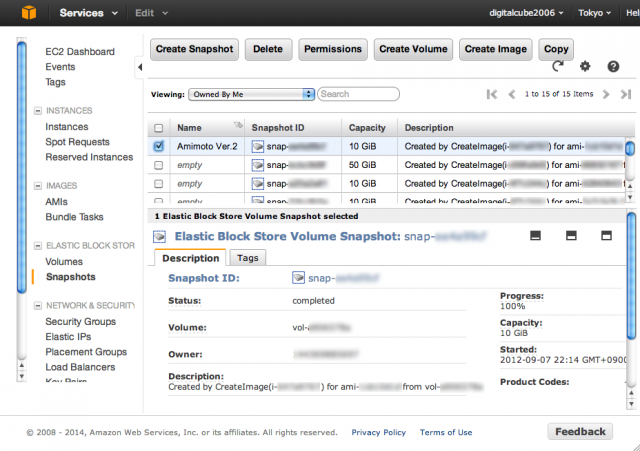
You can find the status of Snapshot creation to select Snapshot at the side menu.
Please wait for the completion.
Create Volume from Snapshot
After the creation of Snapshot, let’s create Volume from the Snapshot.
Select Snapshot at at the side menu.
Check the Snapshot created just before, then click [Create Volume].
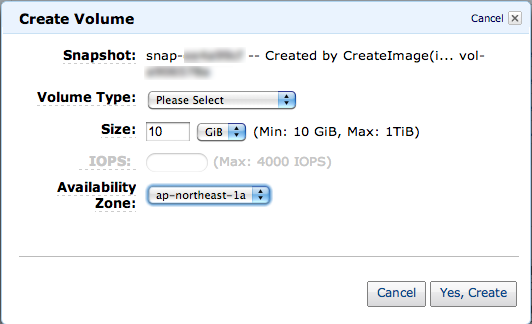
Select Standard for [Volume Type].
You can leave [Size] as default.
Select [Availability Zone] with caution.
You have to choose the same instance as you have just created one before, or you cannot go to the next step.
To find in which Availability zone the instance you’ve just created, check the instances.
You can find the status of creating the Volume with selecting Volume at the side menu.
Attach the Volume to the New Instance
Attach the volume you’ve just created to the new instance and make it mounted from the new instance.
Select Volume at the side menu.
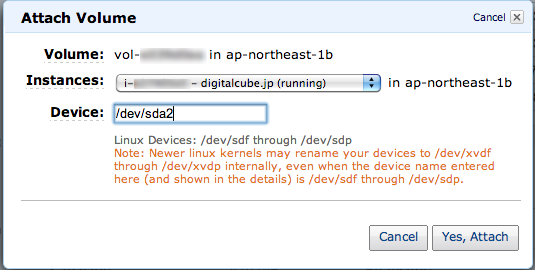
Select the volume you’ve just created, then choose [Actions] – [Attach Volume].
When the Availability Zone is right, you can find the new instance inside the listbox of [Instances], so select it.
Enter /dev/sda2 to [Device], then click [Yes, Attach].
After that, login with ssh to the new instance.
Then, su - to become a root user.
You can change the root password to sudo passwd run .
First of all, check if the attached volume is connected.
It is supposed to be recognized as /dev/xvda2 , so run the next command to verify it:
# ls /dev/xvda*
/dev/xvda1 /dev/xvda2
When it is OK, mount it to /mnt/vol .
# mkdir /mnt/vol
# mount /dev/xvda2 /mnt/vol
Now the snapshot created from the current server can access to the volume from /mnt/vol .
Moving the Data
Next step is to move the data.
Before moving, running processes of MySQL and Nginx may cause trouble, so let’s stop them.
Also please don’t forget to stop monit in advance, otherwise monit will try to restart the process of MySQL and Nginx.
# service monit stop
# service php-fpm stop
# service nginx stop
# service mysql stop
To move the data of MySQL, run the next command.
# mv /var/lib/mysql /var/lib/mysql.bak
# rsync -avz --delete /mnt/vol/var/lib/mysql/ /var/lib/mysql/
# chown -R mysql:mysql /var/lib/mysql
# rm /var/lib/mysql/ib_logfile*
# service mysql start
After starting MySQL without any problem and making sure you are able to log in with mysql -u root, you can delete /var/lib/mysql.bak.
Next, move the data of Nginx.
# mv /var/www/vhosts /var/www/vhosts.bak
# rsync -avz --delete /mnt/vol/var/www/vhosts/ /var/www/vhosts/
# chown -R nginx:nginx /var/www/vhosts
And move the setting file and log off Nginx, start Nginx.
# mv /etc/nginx/conf.d /etc/nginx/conf.d.bak
# rsync -avz --delete /mnt/vol/etc/nginx/conf.d/ /etc/nginx/conf.d/
# rsync -avz --delete /mnt/vol/var/log/nginx/ /var/log/nginx/
# chown -R nginx:nginx /etc/nginx/conf.d/
# chown -R nginx:nginx /var/log/nginx/
# service nginx start
After starting Nginx without problem, you can delete /var/www/vhosts.bak, /etc/nginx/conf.d.bak.
Last, start the service of php-fpm and monit.
# service php-fpm start
# service monit start
That’s all for moving the data.
Detach the Volume Attached to the New Instance
Unmount the mounted volume with unmount command.
# umount /dev/xvda2Next, login to your AWS management console, and open EC2 Dashboard.
Choose Volumes at the side menu, select the volume you’ve just attached, then select [Actions] -[Force Detach]. When you do this, please don’t detach the wrong volume attached to /dev/sda1 .
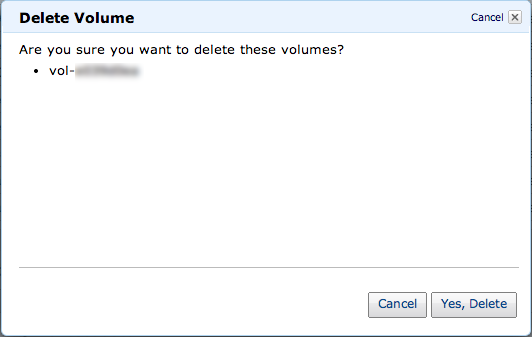
After moving the data, you don’t need the volume. So delete it with [Action] – [Delete Volume].
Putting EIP on the New Instance.
When you finish the steps above, take EIP off from the old instance and put it on the new instance.
Using ELB in front instead of EIP, change the setting for it.
After making sure that everything looks fine, you don’t need the old instance, so stop it. You may terminate it if there seems to be no problem.