
Amimoto AMI has AWS CLI installed in it, which is a tool that allows you to use and manage various services of AWS from the command line.
By using this and cron, you will be able to automatically create the server image backup (snapshot) regularly.
Here, I will explain how to create an IAM user to use AWS CLI and introduce a shell script that creates a snapshot of the volume attached to the running instance.
Creating an IAM User
In order to use the various APIs provided by AWS, Access Key and Secret Access Key are required.
It is possible to get these by using the AWS Identity and Access Management (IAM) service.
In AWS IAM management screen, we will show you how to get the Access Key and how to create a user with necessary privileges to create snapshots.
Creating a Custom Policy
Various policies by default are available in IAM. However, a policy with only snapshot authority is not available, so we will create a custom policy.
First, go to IAM Policy Management Screen.
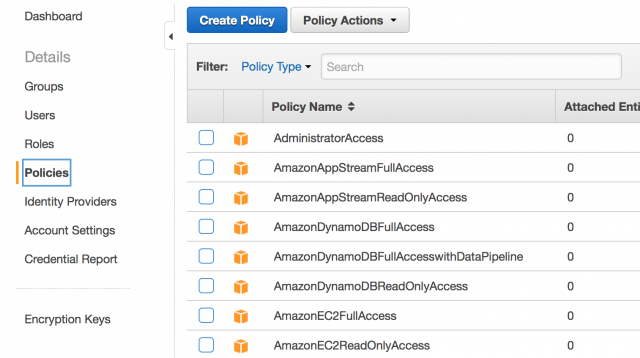
From there, click Create Policy.
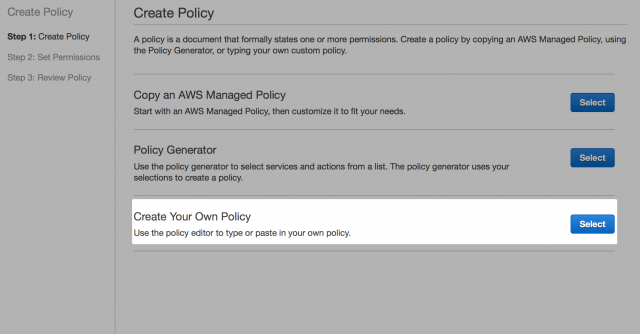
Step 1: Choose Create Your Own Policy
If you click Create Your Own Policy, Step 2 is skipped and you will directed to Step 3 immediately.
Enter the following information and please click Create Policy.
Policy Name
Set the Policy Name
AmazonEC2CreateSnapshotsDescription
Enter the appropriate description for your Policy.
Policy Document
Here, I set the policy in JSON format.
By entering the following, it allows to read the EC2 values and create and delete Snapshot.
{
    "Version": "2012-10-17",
    "Statement": [
        {
            "Effect": "Allow",
            "Action": [
                "ec2:Describe*",
                "ec2:CreateSnapshot",
                "ec2:DeleteSnapshot"
            ],
            "Resource": "*"
        }
    ]
}
Create a Group
Then create a group that has been applied to the policy that you created earlier. You can also set a policy directly to a user. However, because the management user can become increasingly complicated, you can set the policy to a group, where the user belongs to a group with the policy you want to use. With this, management will be much easier.
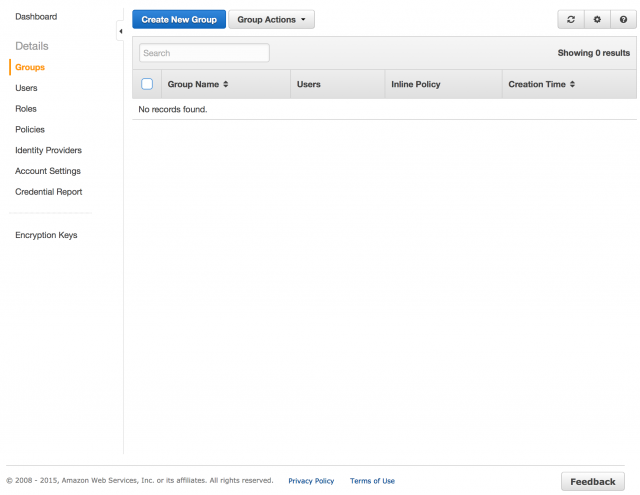
At the IAM Group Management Screen, click Create New Group.
Step 1: Set the group name. At the Group Name column, enter a meaningful name such as create_snapshot and click the Next Step button.
Step 2: Select the policy to apply to this group. The policy created earlier was AmazonEC2CreateSnapshots . Click the Next Step button.
Step 3: You will see what you have set in Step1, Step2 now. If there are no problems, please create a group by clicking Create Group. If a mistake is found, you can return to Step 2 by clicking the Previous button.
Creating a User
You may finally create a user using the AWS CLI to get the Access Key and Secret Access Key.

In the IAM User Management Screen, click Create New Users button.
Step 1: Set the name of the user to be created. Enter User Names by entering a user name in the field, then click Create. You may create 5 people (maximum) at the same time.
When the user’s creation is successful, you will be able to download the csv file with username, Access Key and Secret Access Key.
Click Download Credentials button to download the csv file calledcredentials.csv . This content has one line for each user in the following manner, user name , Access Key , Secret Access Key will be the order of the text written in comma-separated file.
"User_name", AXXXXXXXXXXXXXXXXXXX, xxxxxxxxxxxxxxxxxxxxxxxxxxxxxxxxxxxxxxxx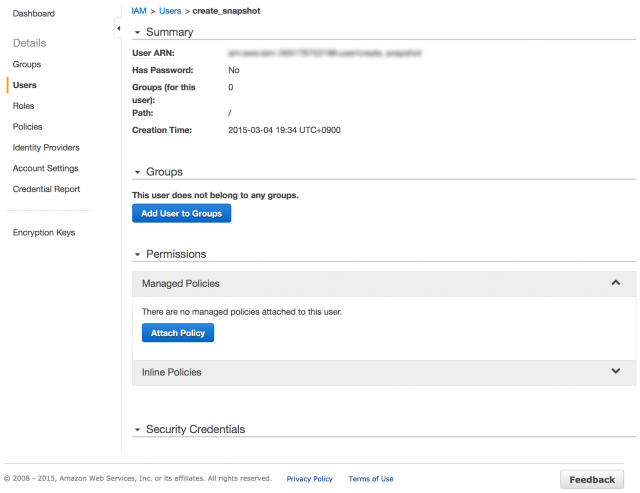
Finally, select the user you just created and show the details, and click on the Add User to Groups button to add the user to the create_snapshot group you just created.
If you did not create a group, click the Attach Policy button to give the policy, AmazonEC2CreateSnapshots to the user you created.
So far, we have created a snapshot authority, and have gotten the Access Key and Secret Access Key of the IAM user.
Next, let’s set a shell script that creates a snapshot to the instance with ssh connect.
Run shell scripts to create snapshot and AWS CLI settings
AWS CLI Settings
Connect to the instance of Amimoto AMI with ssh, and run the following command.
Enter your Access Key, Secret Key, etc. For Default region name , enter ap-northeast-1 if you are using the “Tokyo Region”.
$ aws configure
AWS Access Key ID [None]:
AWS Secret Access Key [None]:
Default region name [None]:
Default output format [None]:
The configuration file value you enter here is created in the directory configand credentials will be saved ~ / .aws /
The configuration files save the values you enter here areconfigand credentials and created in the directory ~/.aws/
Execution of shell script to create a snapshot
Using the AWS CLI, you can create a shell script to create a snapshot of the volume that is connected to your instance.
Please use:
Line 6 is the directory where you want to save the run-time log. Please change to the appropriate directory to where the running user can write.
Line 10 is the name of the region in which your instance is running.
Line 11 is the generation you want to save the snapshot. Since it is set to 2, the third old snapshot will be automatically deleted when you run this script.
Steps to download and run this script to the instance are as follows:
$ wget https://gist.githubusercontent.com/wokamoto/1c53fd9d9ce54c446489/raw/e08459f978ee979fcec3ca3d9d77210dae92bc4c/create-snapshot.sh
--2015-03-04 19: 37: 58-- https://gist.githubusercontent.com/wokamoto/1c53fd9d9ce54c446489/raw/e08459f978ee979fcec3ca3d9d77210dae92bc4c/create-snapshot.sh
gist.githubusercontent.com the (gist.githubusercontent.com) We contact the DNS ... 103.245.222.133
gist.githubusercontent.com (gist.githubusercontent.com) | 103.245.222.133 |: 443 You are connected to it ... was connected.
You sent a connection request by HTTP, we are waiting for a response ... 200 OK
Length: 2383 (2.3K)
And during storage in `create-snapshot.sh '

create-snapshot.sh 100% [========================================== ==========================>] 2.33K --.- KB / s time 0s

2015-03-04 19:37:58 (140 MB / s) - save completion to `create-snapshot.sh '[2383/2383]

$ chmod + x create-snapshot.sh
※ An error will occur because you do not have the write access to /var/log. Please change the directory that can be written by the user who runs line 6.
After that, if you register this script to cron, it is possible to create a periodic snapshot.
For details on how to register to cron, please refer to the following references:
– cron – Wikipedia
– Linux Cron Guide